Quick Start#
In this section, it is shown how to create a plugin from scratch with the new command provided by ALFAsim-SDK. With this template, you can easily customize your application to extend ALFAsim functionality.
This allows you to experience the complete creation of a plugin workflow in a short time.
Set up the environment#
The ALFAsim-SDK is a Python package that helps developers in the process to create a Plugin for ALFAsim, to use this tool it is necessary to have a Python Interpreter with at least version 3.6. For more details on how to install Python check the official docs.
Note
It is recommended that you install the ALFAsim-SDK using the conda package manager. With the commands below, a conda environment would be created with ALFAsim-SDK installed on it.
>>> conda env create -n sdk_env
>>> conda activate sdk_env
>>> pip install alfasim-sdk
Another approach could be adding a environment.yml to your project and declare the alfasim-sdk inside the pip dependencies.
For more details, see Getting started with conda.
ALFAsim-SDK requires:
CMakeat least version 3.5.2
Ninjaat least version 1.7.0
The alfasim-sdk package has a built in command line interface (CLI) that is used to create a new plugin template. You can get the
help on how to use it with the following command
>>> alfasim-sdk --help
Creating a Plugin Project#
To create a new project, run:
>>> alfasim-sdk new
After the execution of the command above, you will be prompted to fill the following options (all required):
>>> alfasim-sdk new
... -- Plugin Caption: Myplugin
... -- Plugin Id: myplugin
... -- Author Name: ESSS
... -- Author Email: <email>@<server>
- Plugin Caption:
The caption to be used across the application to identify the plugin.
- Plugin Id:
The name of the plugin to be referenced during the development.
- Author Name:
Name of the plugin author to be displayed.
- Author Email:
Email of the plugin author to be displayed.
To check all options, call the help command:
>>> alfasim-sdk new --help
After the execution of the new command the generated plugin project will have the following structure:
\---myplugin
    |   CMakeLists.txt
    |   tasks.py
    |
    +---assets
    |       plugin.yaml
    |       README.md
    |
    \---src
        |   CMakeLists.txt
        |   hook_specs.h
        |   myplugin.cpp
        |
        \---python
                myplugin.py
The highlights here are for:
- plugin.yaml:
File with all information about the plugin that will be used by ALFAsim.
- myplugin.py:
Implementation of the hooks for customization of the UI interface, or the solver configuration hooks.
- myplugin.c:
Implementation of the hooks for customization of solver.
Check out the Plugin Structure section for more details about how the folder and files are structured, and also, check the Plugin by Example that shows how to create simple plugins that make use of the User Interface Hooks and the Solver Hooks.
Invoke#
From version 0.17.0 onwards, ALFAsim-SDK started using pyinvoke tasks in order facilitate and standardize the plugins development process
using pre-defined tasks. A standard tasks.py file is generated automatically by the new command, which can be customized by the user if needed.
To list the tasks available, use:
>>> cd myplugin
>>> invoke --list
Creating a package#
From the root directory of the plugin, execute the command invoke package. This command will compile your C/C++ implementation and include the shared libraries inside a artifacts directory and the generated plugin on the root directory with the extension hmplugin.
>>> cd myplugin
>>> invoke package --package-name=myplugin
The plugin directory will have the following structure when executing from a Windows Operating System:
\---myplugin
    |   CMakeLists.txt
    |   compile.py
    |   myplugin-1.0.0-win64.hmplugin
    |
    +---artifacts
    |       myplugin.dll
    |       myplugin.lib
    |
    +---assets
    |       plugin.yaml
    |       README.md
    |
    +---build
    |       < ... >
    |       < ... >
    |
    +---package
    |       myplugin.dll
    |       plugin.yaml
    |       README.md
    |
    \---src
        |   CMakeLists.txt
        |   hook_specs.h
        |   myplugin.cpp
        |
        \---python
                myplugin.py
Installing the plugin#
With myplugin.hmplugin file, it is now possible to install it on ALFAsim application.
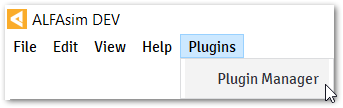
From the menu bar select the Plugin Manager option, as illustrated in the figure below:
In the Plugin Manager windows, install myplugin.hmplugin file plugin.
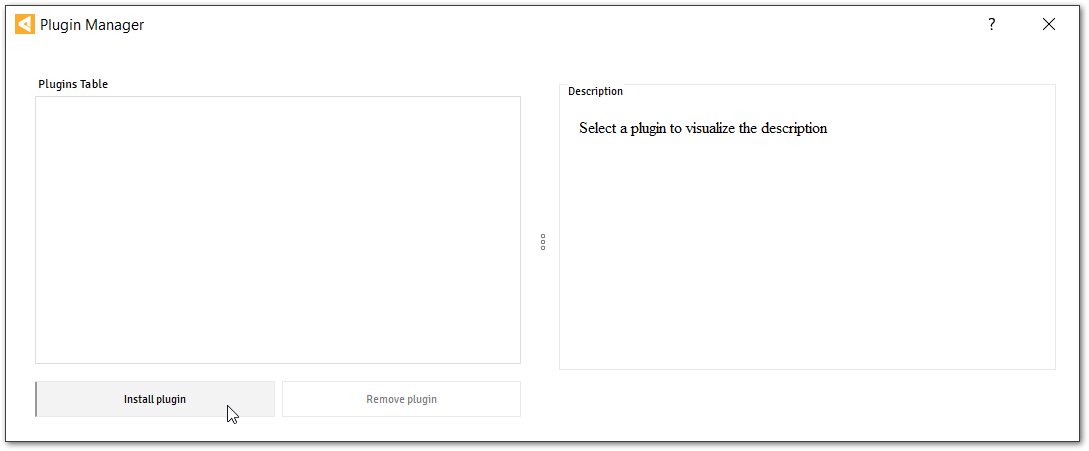
By clicking on the plugin name, it is possible to visualize the content from the README.md file.

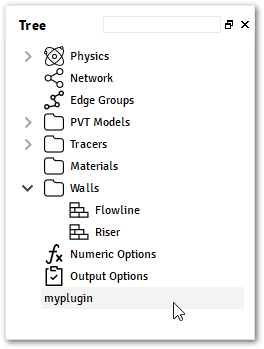
Restart the application and check the recently installed plugin available over the Tree.